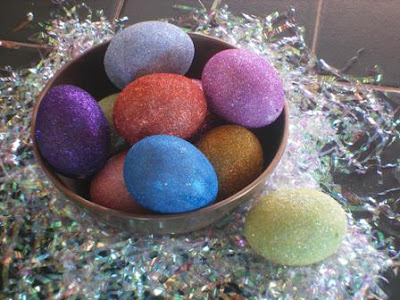
(Easter Real Eggs Blown Glitter Craft)
I saw these at the Martha Stewart.com site. They are so pretty. I am a glitter nut and I couldn’t wait to start. Little did I know it would take me a week to prepare enough meals with eggs to get 12 shells. I suggest you make a big round of scrambled eggs or a quiche to get the shells faster than my politely asking everyone in the house to let me know when they are about to use an egg—so that I could blow it for the shell. Although, it was entertaining for the kids watching me blow my brains out blowing an egg.
Needed Items:
EGG SHELLS (cleaned & dried)
WHITE GLUE (or spray adhesive)
PAINT BRUSH
BAMBOO SKEWERS (every crafter needs these)
GLITTER (highly pigmented is best over Transparent)
GLITTER WORK AREA (a large box lid or bowl)
STYROFOAM HUNK (secure to a heavy base)

When your eggs are ready to work with, gently push a skewer into the larger egg hole. Carefully guide the tip through the top and smaller hole. Lightly make snug. (NOTE: One of my eggs had holes too big for the stick to be snug. Wrap a piece of cellophane tape on the stick just outside the egg holes.)


Pick your first glitter color and take the top off the container so it’s ready to use. Water down the glue a little bit and cover paint the whole egg. Don’t get too much on the stick (the glitter will pull off there later.) Start glittering the entire surface. I did the ends before the egg middle. Stick the skewer into your Styrofoam stand and let dry.

When the eggs are dry, use them to decorate around the house. Use a basket or beautiful glasswear. That’s the way they showed the eggs at Martha Stewart. Kids can easily do the glittering (and they love it). But after they dry, the eggs really aren’t a toy to play with and touch a lot. Still they are lovely to display and enjoy. And it’s a lot of fun to say “I made these myself!”.


