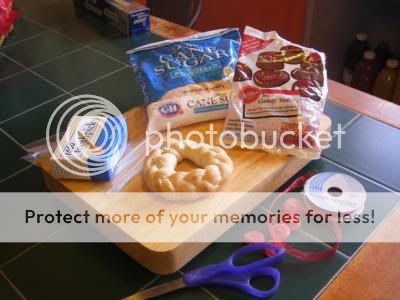
Tuesday, December 23, 2008

Breadstick Wreath


You'll need:
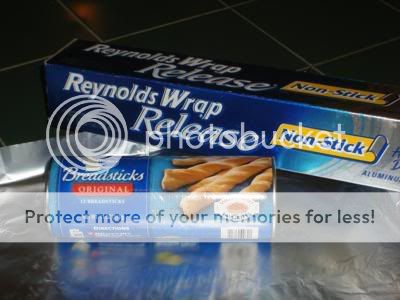
Any Brand Breadstick Dough
Confectioners Sugar
Red Cinnamon Dots or Red Food Coloring
Toothpick
Ribbon for a Bow


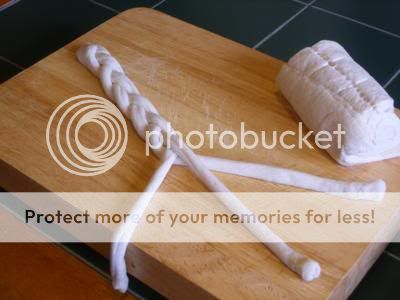
Open your dough. Take three pieces apart and lay out flat, pull and stretch the dough till about 12 or 14 inches long.


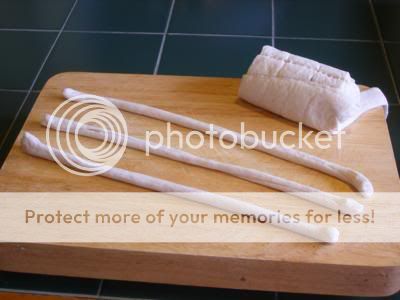
Braid them together. I pushed my thumb into the starting pieces to secure a bit to the cookie board. Finish the braid.


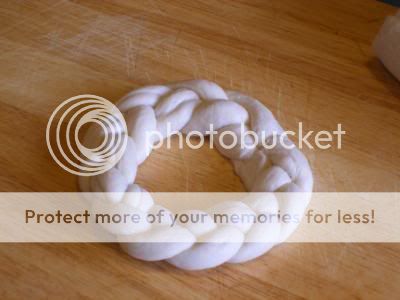
Curl into a wreath shape. Shape the ends together neatly.


Cook according to package directions.


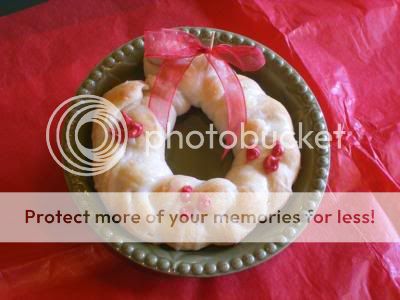
After it has cooled, drizzle confection sugar glaze over the wreath.


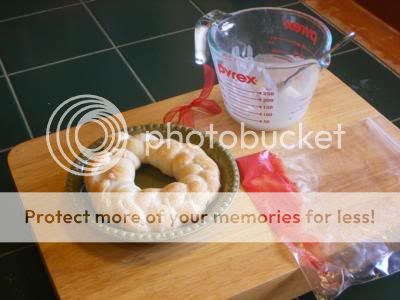
If you have cinnamon dots, place three together like holly berries. I didn't have any, so I colored a little bit of the confection glaze with red bark and dabbed out my little berries. I made a red ribbon bow and with a toothpick I stuck the bow to the wreath where the ends had met. This are still dinner rolls. You've barely used much glaze and they haven't magically become sweet either, just pretty.


A few of these in a basket on a set table would look very festive, and your little cook will feel a great deal of satisfaction and accomplishment.

Victoria Swanson

Monday, December 22, 2008

Merry Christmas!

We would like to extend a very Merry Christmas to all our subscribers and readers.

Kemi Doran and Victoria Swanson

Wednesday, December 17, 2008

Reindeer Magnet Clips


I thought up these cute little reindeer since my turkey magnet clips were so popular, so here are the Reindeer Magnet Clips.


Materials Needed:
Foam sheets in Brown or Tan Shades or Black
Clothespin
Sheet of Paper and a Pencil or Pen
Googly Eyes
Small Red Pom Pom
Small Jingle Bell
Scissors
Glue Gun or Tacky Glue
Magnet Strips


Using your sheet of paper and pen or pencil draw your pattern, the face is a large circle with a smaller circle for the mouth area of your reindeer, it is approximately 2-1/2 inches tall and 2 inches wide. You can use a compass if you like or a jar lid it it's small enough or maybe you have a good eye. For the antler pattern I drew what looked like a cactus, probably because I used green paper. It is approximately 2-1/2 inches long and 1-1/2 inches wide. Cut out your patterns and trace with a pen onto your foam sheets as you see below.


Using your scissors, cut out your foam pieces. I also cut out small football shapes of the same color as your reindeer face for ears. You will see them in the photo below.


Glue your reindeer face onto your clothespin leaving about 1/2 inch at the bottom to glue on a jingle bell. I found that googly eyes look best when placed right next to each other. My first attempt at these reindeer clips I spaced them apart and he looked like an angry reindeer, LOL. So glue your googly eyes next to each other and glue on your pom pom nose. Glue your ears behind the top of the reindeer face as shown above.


Next glue your reindeer antlers behind and between your clothespin and the ears you glued on already. You may need to trim them at the bottom some if you like to make them easier to glue and not overlap the clothespin. You want them glued to the back of the foam face, not the clothespin.

All you need to add now is a jingle bell, glue it just below the face onto the clothespin. If you have self-sticking magnet strips just cut off about an inch or so and stick to the back of your clothespin or glue on if it's not self-stick. These were fun to make and they look cute on my refrigerator.


Kemi Doran

Tuesday, December 16, 2008

Reed Oil Diffuser


A Dollar Store Craft

This is a nice house warming and holiday gift that we mommies and school age kids can easily make and have several done for those last minute gifts. Be creative in packaging for that extra special personal touch.


The Dollar Tree carries these items:
Bamboo Skewers (cut down to 7 to8 inches and file smooth)
Or Corn (Elote) Sticks, these are already the best length
Liquid Potpourri (at my store these are huge, 33 oz.)
As a gift - look for small oil containers
Small Glass Globe
Small Glass Pebbles


For Your House:

Clean the container well. When dry place about 1 to 2 inches of glass pebbles into the glass. Place in as many sticks that looks right to you and arrange. Now is the last time you can adjust the length without making a mess. Take the sticks out again before adding the oil. Pour in the oil in to about 1 and a half inch. Replace and arrange the sticks. Place in a nice location that isn’t in a high traffic zone. As the scent fades after a couple weeks you may refresh simply by turning over the sticks. I gave my sister one last year and it lasted a long while. Sometimes she would pour in more oil, I think she got a year out of her diffuser and the oils I sent with the gift.


Oil Diffuser as a Gift:

Michaels, Jo Ann and craft stores carry oil fragrances in the flower department. They are small, about 1.5 fl oz. and very good. At the dollar stores you might consider the little auto spray fragrances, these are very strong too. Creatively wrap the items and include instructions for use. I made these for my siblings last Christmas.

Reeds or bamboo skewers will sometime have sharp points. Use a nail file to make blunt. If your sticks are too long to look nice, cut and then file to smooth.

Victoria Swanson

Saturday, December 13, 2008

Dollar Store Christmas Wreath


All the materials used to create this lovely Christmas wreath were purchased at the Dollar Tree, you can find most of this at any local .99 cent store or dollar store. There is no end to the possibilities you can create here by purchasing different material combinations. I purchased a wreath base that needed alot of molding and bending but looks pretty decent, small red poinsettias bunch, white snow frosted holly leaves and berries, red snow frosted holly leaves and berries, gold wired garland with red and gold glass ball clusters and gold berries. I already had in my crafts stash the large jingle bells, left-over from the jingle bell doorknob hangers, and the wire edged christmas ribbon from a project last year. Total cost of this wreath would be approximately $5.00.


I started my wreath with the pointsettias. Clip the flowers off the stems individually or in clusters, I used clusters of three. Using a glue gun, glue them as you wish onto your wreath base or as I have shown below.


Next I added some of the wired gold garland and the gold berries stemming out from my poinsettias, but you can do what you want, it's your creation. You may be working with completely different materials, so just go crazy.


I added the white snow frosted berries and some of the red glittered holly leaves and the red and gold glass ball clusters.


Last I added the red snow frosted berries and the white snow frosted holly leaves. You could say you are finished at this point, but we can do a little better by adding a bow and a jingle bell.


I have this wreath hanging on my fireplace right now among the stockings and garland, it adds a great touch and was extremely easy to make! Hope you have a great Holiday!


Kemi Doran
Related Posts Plugin for WordPress, Blogger...